After the addition of our new, wonderful, amazing, incredible, fabulous hot water system (post here), we made another incremental improvement. We added a valve to send the cold water left in the pipes back to the water tank, to make way for the luxurious hot water without wasting a drop (fresh water’s precious on Legacy!).
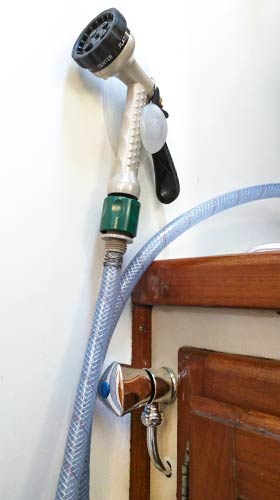
It’s the valve near the bottom of the picture. It takes hot water from just below the shower faucet and has a hose that runs back to our main fresh water tank. You can feel the valve get warm after just 10 or 15 seconds. Then turn off the valve, and the shower’s ready.
I’ve always wanted to do this. Normally, we start with showering our legs or feet – areas of the body that don’t convulse or go into shock when hit with cold water. Now, even those parts don’t have to suffer.
On a related subject, that garden sprayer in the picture is our shower head. We had the typical one that doubled as a sink faucet, but some fool decided that they couldn’t be allowed to shut the water off completely else the badly made rubber hose would explode. This constant dribble of water isn’t very good for those of us trying to conserve water.
Enter the garden sprayer. It has seven selectable spray patterns and does shut off completely while you shampoo. We use the “mist” patter as it gives a forcefull rince while using very little water. When we’re in a marina with lots of fresh water nearby, we use the “shower” pattern for a very satisfying shower experience. The “jet” is handy for cleaning. We really, really like this even though it might not look all that classy. (Our friend called it our redneck shower head.) I’d even do this if and when we return to land life. -Rich
I see boats sitting at the dock with the engine running for hours at a time, making noise, making diesel exhaust fumes for their neighbors and using up expensive engine lifetime, all for no reason. Oh, they’d say it’s to charge batteries. They’re always US or Canadian boats. They have 120 volt systems, while the rest of the world uses 220 to 240 volts.
They’ve often been told that they’d need to spend thousands to rewire their boat. They’d need to comply with a multitude of regulations and get a Warrant of Fitness (NZ) every year at a cost of hundreds of dollars. Wrong-o-buck-o! There’s a better way.
Maybe we stumbled into this blindly, or maybe we’re just cheap, or maybe just lucky, but what we did for under $200 has been working so well for us.
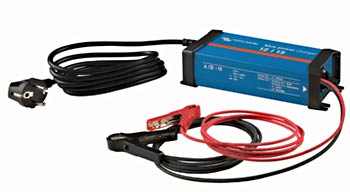
When we first got to Opua, New Zealand four years ago, we bought and “installed” a very inexpensive, 10 amp charger (ours happens to be made by Victron Energy but there are many to choose from). We cut off the alligator clips and wired the output side into our 12 volt system. I put “installed” in quotes because we left the NZ AC plug intact.
We plug the charger into an inspected (WOF’ed) power cord and leave it on all the time (or at least we did, before we had more solar power than we know what to do with!). Each year in NZ, we need to get our cord inspected, but that’s $25 or so – much less than getting the all the boat’s wiring inspected.
I’ve called this a trickle charger, only because of the low, 10 amp charging rate, but it’s not a typical trickle charger. It’s actually a sophisticated, 4 stage charger that won’t harm batteries if left on indefinitely. Ten amps isn’t much, but multiply it by 24 hours and we’re talking 240 amp-hours. That’s more than we can use, especially when supplemented by even moderate solar or wind power.
For AC, at least the US and Canadian 110 volt flavor, we use our inverter. We plug our little 230 volt space heater into a Y connector, plugged into the power cord. That’s also how we connect or New Zealand purchased power tools.
Done. That’s it. No rewiring. No excessive engine or generator hours. No annoyed neighbors. No hassle. -Rich
“So, what’s the big deal?” you ask. (Or maybe, “It’s about time!)
The big deal is this: When we installed our amazing new solar panel and controllers, there was an unintended consequence. We no longer needed the two or three hours every other day of engine running to keep the batteries charged. In fact, we only ran the engine once during the entire cruising season for charging alone. Running the engine made hot water. No engine running – no hot water. That’s not a big deal in the tropics but here in New Zealand, it’s a disaster!
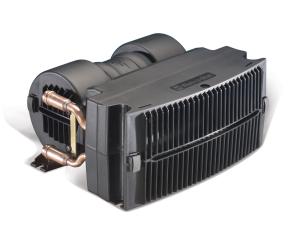
So when our hot water heater tank started leaking, and we found out it would be over $1000 to replace it in New Zealand, we looked for other options. Enter our new Espar (Eberspächer) Hydronic heater.
Just before we left for the tropics in 2012, I installed one of these heaters. (Yea, smart, I know… installing a heater before heading to the tropics, but I knew NZ was in our future – or at least Cyndi knew!) We knew we needed to run this heater once a month or so to keep it working, but we didn’t. Water got in the air intake and it seized up. The replacement parts for repairing it were more than a new heater, so it just sat there, non-functional for a couple of years.
A new one (about the same price as a new traditional boat water heater) seemed like the solution to all our troubles. We could use the new heater to heat the boat on cold NZ mornings when not at a dock, and with the addition of a heat exchanger, we could make hot water (so the theory went). We ordered both from England and now they’re installed and working better than I could have ever imagined.
My imagination was limited by the lack of data available on the heat exchanger. I tried doing the math to see if this combination would give us enough hot water. No data… no math. I found mention of this combination on Cruisers Forum but nothing conclusive as to the results from those who’d tried it. I’d have to go on faith.
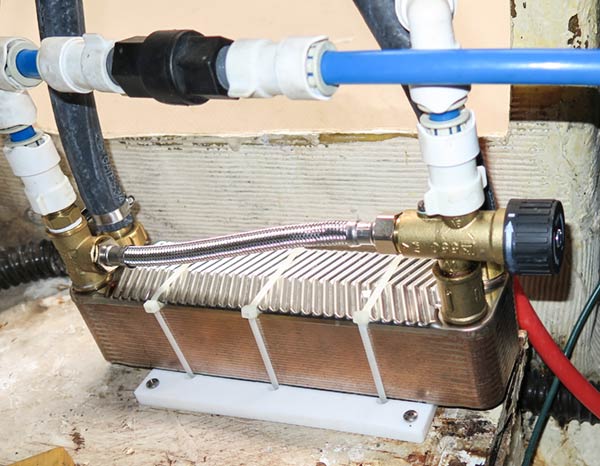
Our Webasto Plate Exchanger, installed.
It seems like plate-type heat exchangers are pretty common, but not on boats. I’d never seen one before. This one by Webasto was hard to find. I found only one company who sold them and they were also in England. I could have bought a generic plate exchanger, but this one included a mixing valve and I thought that might be useful.
Now it works:
The heater heats antifreeze and pumps it through the system, first to the plate heat exchanger for the hot galley and head water, then through a small radiator with a fan for cabin heat. It stores no hot water, but we still have a limited supply for a short time after the heater is turned off.
The plate heat exchanger is clever. It’s made from about 25 stamped, stainless plates, smashed together and brazed. Fresh water flows through every other plate pair, coolant through the neighboring plates. It’s very compact and very efficient. There is a thermostatically controlled bypass valve that keeps the product water from getting too hot by mixing in some cold water. I think this is a nice, though not completely essential, addition.
The Results:
Wow, wow, wow!!! After running the heater for three minutes, there’s all the hot, hot, hot water you could ever want (limited only to the supply of fresh water on hand). The temperature is not only hot enough (too hot without mixing in some cold water), but incredibly consistent. Our boat shower is now much nicer than many we’ve had in houses and hotels. (Coupled with our sophisticated shower head.)
I don’t understand why every cruising boat doesn’t have this setup!
The Sources:
It was kind of hard finding the parts, and I ate up more than a few GB in the search. Here’s what I went with…
The heater, we bought from Heatso (UK). They were great! Very fast, and very professional. I do not hesitate to recommend them. The heater we bought is the (Eberspächer) Hydronic II D5S along with the installation kit and SmartStart Select controller.
The heat exchanger is a Webasto “motor home plate heat exchanger with mixing valve 4111209A” from Buttler Technik in the UK. There service was great, once I figured out I had to use PayPal as they had problems accepting international credit cards.
This is the radiator and three-speed blower we have installed. They’re available as add-on or replacement heaters for cars. We have only one and it’s in the galley. Even on the coldest mornings, the boat is warm about five minutes after turning the heater on.
We have no thermostat for the fan. I thought I’d build one eventually, but now I don’t feel the need.
It might have been better to install a few, smaller radiators around the boat with almost silent computer fans, but this was a simple solution and since I first installed it when we were already late leaving for the tropics, I was in a hurry.
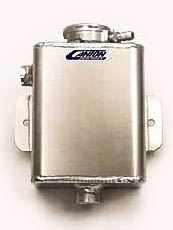
I installed a reservoir tank like the one in this picture. My thoughts were that this would allow for coolant expansion (really not necessary as the rubber hoses do this), make an easy place to fill the system and check the coolant level, and finally, add some coolant volume to the system. I probably should have gone with a slightly larger tank (I’d say mine holds about a liter), but this is working just fine.
I can’t remember where I bought this tank. You might try to search Google images for “aluminum reservoir tank.”
I’ve said nice things about the companies that I purchased the parts from, but I would be remiss without adding a comment about Espar’s TERRIBLE documentation. Hey guys, just because you put it on a CD, doesn’t mean it isn’t CRAP!!! I feel good about the quality of the heater, but it was a difficult install, largely because of the poor documentation and even though I was replacing another, very similar Espar heater. This project is not for the faint of heart.
Please email me if you’d like more details about the installation. -Rich
Update, October 23, 2019
I’d hoped that the flexibility of the hoses would be enough to allow for the expansion of the coolant, but I don’t think it’s so. The heater leaks a little coolant from the coolant tank, enough that I have to top up the fluid every six months or so. I added this simple expansion tank to the reservoir…
I would have just purchased a plastic, after-market tank at an auto parts store but they’re not available here in NZ so a soda bottle and a 3D printed holder did the trick.
Update, February 27, 2016
After using it for a while now, it remains one of the best things we’ve done on our boat. In the interest of fair, balanced reporting, here are the negatives:
We occasionally smell diesel exhaust from the heater. This only happens as the heater starts up and the wind is in the right direction. It doesn’t last long.
When we get in from a long motoring run, there’s no hot water. We have to run the heater for a whole three minutes to get our hot water! Three minutes! OK, I guess I can wait that long 😉
I feel bad about running the heater when we’re tied up at a dock with neighbors (we do it anyway, but I feel bad). I feel bad about both the noise (we didn’t install the muffler that came with the heater and I hear from people that it really helps quiet the system) and the exhaust smell that might blow into their boats. In truth, this really hasn’t been a problem.
I’ve had a couple of questions about the system and one thing I’ve been suggesting is that it might be best to run the coolant to the plate heat exchanger first, before any of the radiators. I think it’s best to get the hottest water possible to the fresh water heat exchanger.
At the Wooden Boat Festival in Tasmania, I found a company that sells many of the components necessary to install a system like ours. Here’s their website: DieselHeat.com.au
No matter if your anchoring religion tends to the church of Rockna or some other denomination, while gathering information to replace my chain, I found a very nice resource Rockna’s website here:
I thought it would be simple to replace our rusting, ten year old chain, but no. First, what kind of chain did we have? It turns out it might not have been the 1/4″ high test that we thought it was. It seems that “High Test” and “High Tensil,” terms that represent very different animals, are often used interchangeably by marketers.
I’m resigned to replacing the chain wheel on our anchor windlass to fit the metric chain available in New Zealand. What chain wheels does Maxwell actually make? Which can be readily sourced?
Will I be able to maintain the same strength in our anchor rode (and since I’m now not sure what chain we had, what working load or breaking load numbers should I look for?)
Oh yea, to complicate that issue, working load seems to be nothing more than another marketing team invention. In the US, working load is often chosen to be 1/4 or 1/3 the breaking strength (which looks more impressive). In New Zealand, it can be 1/5 or even a smaller fraction. That leaves only one choice: just look at breaking strength. Easy right? Nope. I can’t seem to find any breaking strength numbers on the chain available from local marine stores.
And now there’s the weight issue. Legacy is very sensitive to weight in the bow. Add a little too much and the ride gets much wetter. How much weight will we gain with new chain? How will I offset that weight gain in the bow? Can I stow the secondary anchor rode further aft?
Old school says as much as you can carry of the largest chain possible without completely sinking the boat. It turns out that maybe with modern anchors, this might not be necessary. Here are two great articles on Rockna’s web site:
Anyway, I’ll muddle through it all. The point of this was that I am really impressed with the info on Rockna’s website. There’s also good info about shackles. That’ll be the next part of our new chain saga. -Rich
Update, February 22, 2016
We found and bought new chain! It’s Acco 7 mm Grade 40 chain and it’s almost exactly the same size as the 1/4″ chain we had. It fits in our chain wheel perfectly. We bought it at Bridon Cookes in Tauranga. What great people. They know their stuff!
Acco 7mm Grade 40 Chain (A4, DIN 766):
Working Load: 750 kg = 1,653 lbs (meaningless marketing stuff, see above)
Breaking Load: = 30.8 KN = 6,924 lbs
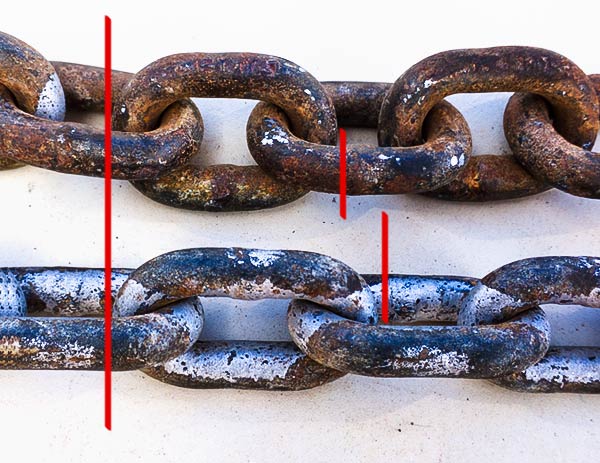
We took the old chain to Bridon Cookes and they tested a sample of our old chain to the breaking point, which turned out to be 4,050 kg, or 8,928 lbs. This surprised me and was much higher than expected from it’s outward appearance.
Above is the chain before and after the test. I was amazed at how much it stretched. The bright silver is what happened to the galvanizing. The chain at the top shows the worst of the rust.
The above image shows how dramatically the chain narrowed during testing at the points where it meets the adjoining link. I think I’ll take a lesson from this and inspect these spots in our new chain periodically.
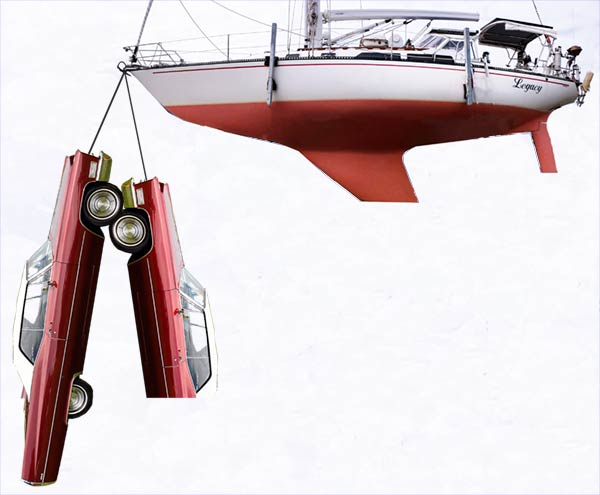
OK, lets do the math. Did I really need new chain?
cb = curb weight of a ’68 Cadillac Coupe DeVille = 4,900 lbs bs = breaking strength of our chain = 8,928 lbs ce = Cadillac Equivalents
bs / cb = ce = 1.822 ’68 Cadillac Coupe DeVilles
I’m pretty sure that they’d pull the bow off legacy before the chain would break.
But seriously folks. I probably could have re-galvanized our old chain and gone another ten years. I read that re-galvanizing reduces the strength of the chain but I don’t know how much. Live and learn.
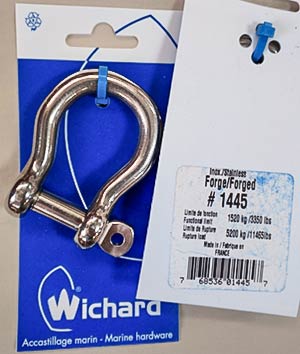
Shackle were another issue. The only shackles I could find that were load rated, and with a high enough load to match the chain where stainless Wichard forged bow shackles.
Working Load: 3,350 lbs
Breaking Load: 11,465 lbs
The pin was too tight in the chain links but a tiny fraction. I was able to expand the link that tiny bit needed by brute force, a hammer, and a now ruined socket used as a wedge. (I don’t want to think about what that might have done to the strength of the chain!)
Update: September 3, 2021
The chain we bought from Briden Cooke, supposedly Acco, was trash. In two years it was badly rusted, so bad that we replaced it in May of this year.
Chain is really hard to come by in New Zealand (thanks Covid!) and we had to go up a size – from 7mm to 8mm. Fortunately, or chain gypsy is so worn that the new chain fits great.
Unfortunately, the new chain is heavier and Legacy is very sensitive to weight in the bow. For this reason, we went down to 61 meters of chain from 70 meters. Oh well.
This is the view from our cockpit last night as we welcomed 2016. That’s right North America, it’s already started here and it’s a very good one so far. We hope yours is too!